Windows Defender is the default antivirus system that comes with all new Windows versions. The AV program protects a user’s computer from threats such as viruses, spyware, ransomware, and various other types of malicious programs.
The program is super useful, especially for users who don’t have a third-party antivirus suite. However, sometimes it can be too protective and prevent you from installing or even downloading software that you deem safe. Apart from that, you may also want to disable the software and replace it with a top antivirus software for your OS. This would provide you with more security features and protect your device from new and advanced forms of malware.
Similar: How to Enter Bios Windows 10 on Startup [Proper Guide].
Whatever the reason, this guide will show you three methods you can use to disable Microsoft Windows Defender, both temporarily and permanently.
Method 1: Disable Windows Defender using Windows Security (Temporary)
If you want to install or use a particular program for a short while, you can temporarily disable Windows Defender using the Windows Security settings application on your computers.
To do so:
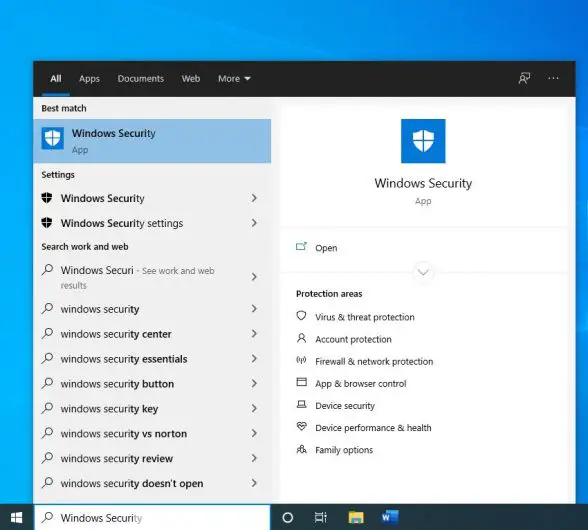
1. Go to the Windows search bar and type Windows Security. The app will be displayed as the main suggestion. Open it.
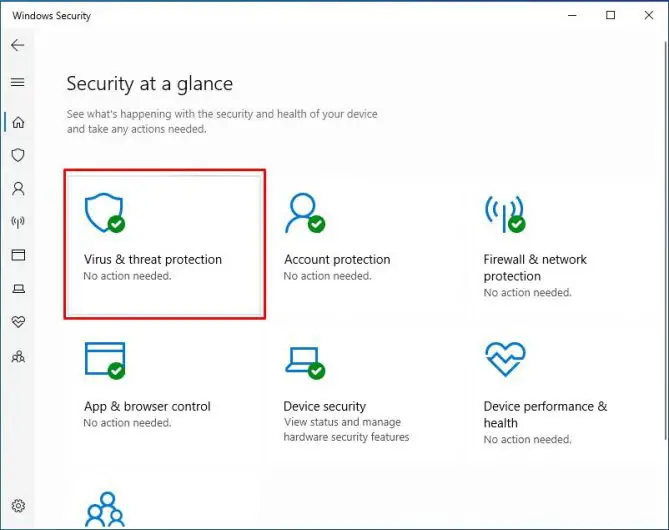
2. On the Windows Security menu options, choose Virus & threat protection.
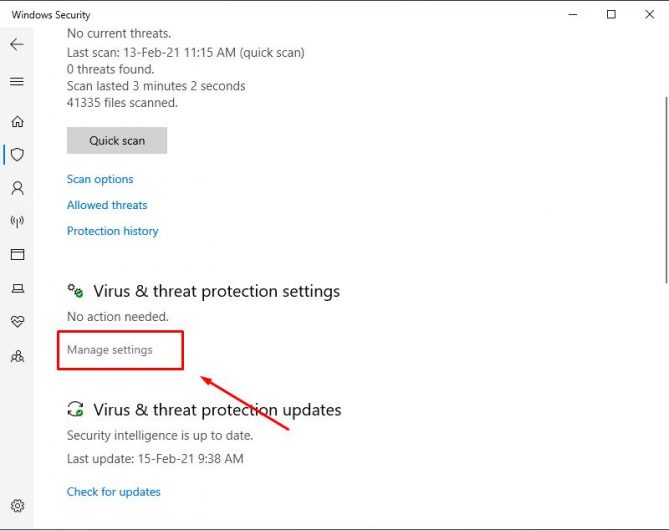
3. From there, click Manage settings under Virus & threat protection settings.
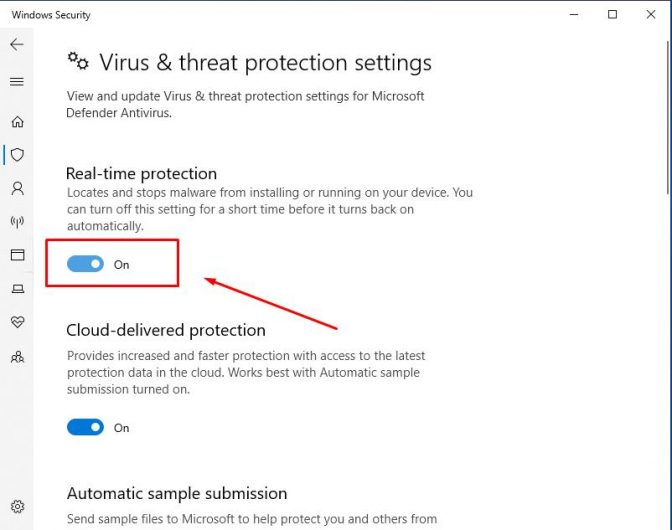
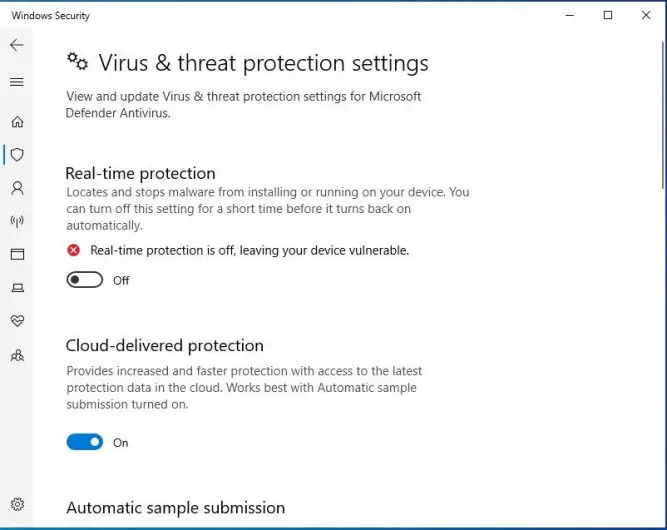
4. You’ll now get the option to turn off Real-time protection. Toggle the blue button.
5. After that, Windows will ask you if you want to allow the app to make changes to your system. Select Yes, and Windows Defender will be turned off. You’ll get a notification on the same.
Note that this is a temporary solution, and Defender will be turned back on when you restart your device. If you wish to turn the antivirus back on yourself, you can repeat the same procedure and toggle the Real-time protection button on. It should turn blue when the protection is active.
Method 2: Turn off Windows Defender using Group Policy (Permanent Solution)
If you want to turn of Windows Defender permanently, you can do so using group policy. Here are the steps to follow:
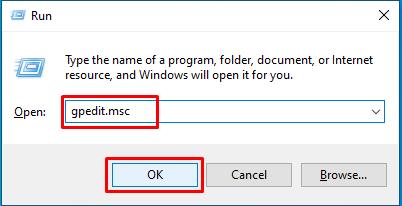
1. Press the Windows logo + R key. This will open the Windows Run box. Type gpedit.msc in the search box, and then click OK.
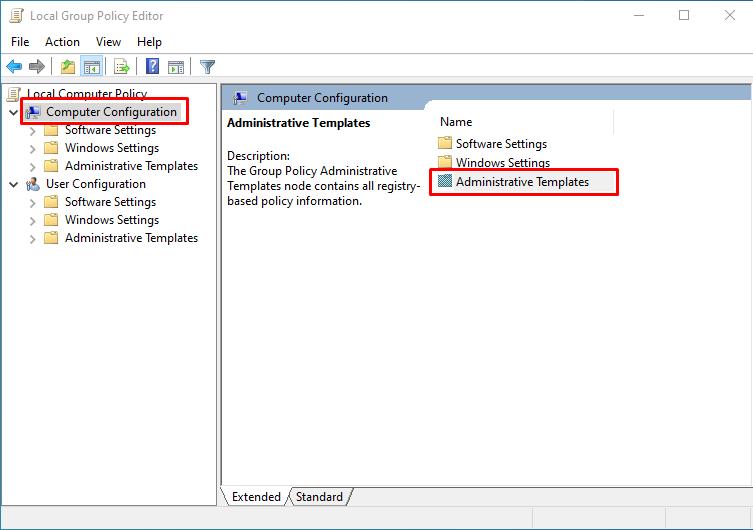
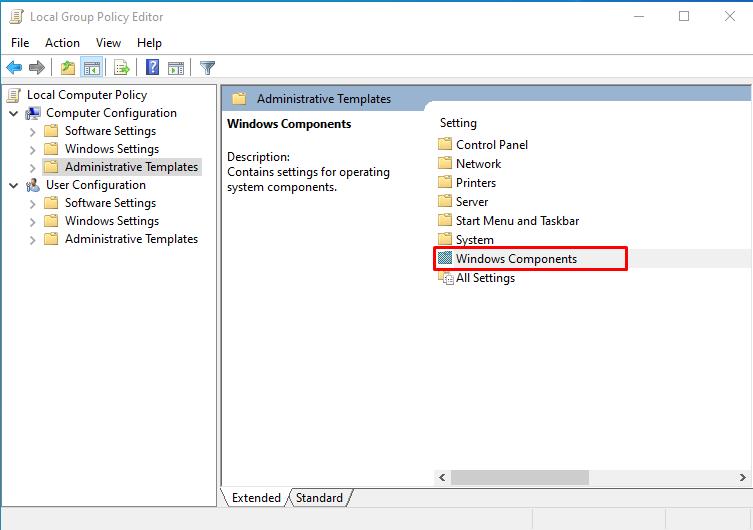
2. After that, the Local Group Policy Editor will open as a popup window. Click on the Computer Configuration option and double-click Administrative Templates on the right side.
3. Under Administrative Templates, double-click Windows Components to open its menu.
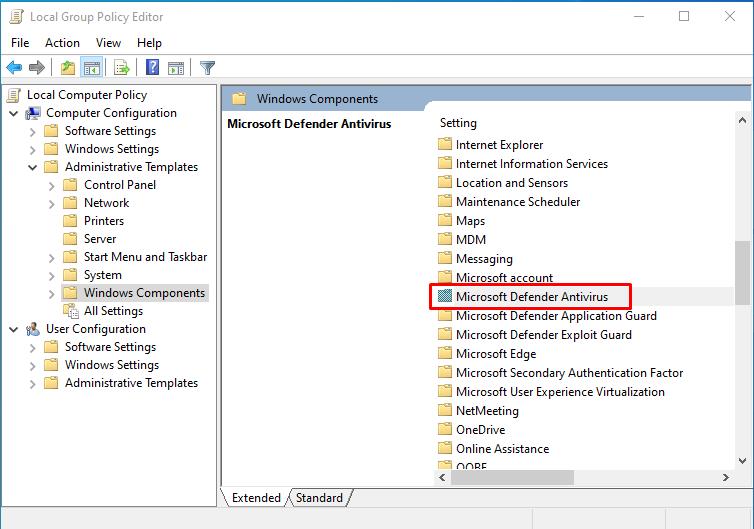
4. On the settings options, scroll down and double-click Microsoft Defender Antivirus.
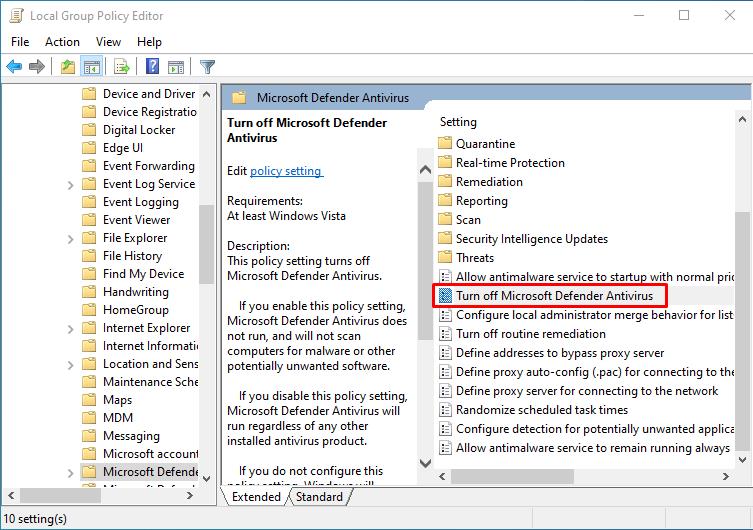
5. Now, double-click the Turn off Windows Defender Antivirus option, and a new popup window will appear.
6. On the popup, select Enabled and click Apply then OK to disable the Windows Defender Antivirus permanently.
7. Now, restart your device, and your Windows Defender will be turned off permanently.
To enable Windows Defender, you can follow the same procedure and select Disable in step 6. Click Apply then OK to enable Windows Defender. You can then restart your device and the new settings will take effect.
Method 3: Disable Windows Defender by installing a third-party Antivirus
You can also disable Windows Defender by installing a third-party Antivirus. This method doesn’t require you to use any workarounds as Windows built-in protection is automatically disabled when you install another antivirus.
If you wish to use this method, it’s important to opt for a complete AV solution that offers more than Windows Defender. Head to the AV’s website, download the software, and simply install it on your PC.
After that, Windows Defender will be automatically disabled. To confirm this, Open Windows Security and click Settings on the bottom left side of the application. Under Security Providers, click Manage Providers and you’ll see the active Antivirus system.
How about Windows Registry?
For a long time, Microsoft has been allowing users to disable Windows Defender permanently using Windows Registry. However, that option is no longer available for newer versions of Windows.
To disable Windows Defender either temporarily or permanently, the above three methods should help you accomplish that. From there, Windows Defender won’t stop you from downloading or installing any software. However, if you use method 1 or 2, make sure that you trust any programs that you install.

