
Let’s say you’re working on a very important document on your precious and beloved Windows computer and you come across an article or webpage that enlightens you from the within. It is so good that now you want to save it as a permanent copy. Unfortunately, you can download webpages just like that. It’s a real pain! In that case, the immediate thought that crosses your mind is of taking a screenshot. But unfortunately, you are one of those newcomers who have not a clue of how Windows works and what is to be accessed from where. The same can be the case for a really good photo or just a snapshot of your screen that you desire to save on to your permanent storage. Let’s check out how to take a screenshot on windows by different methods.
You search the web for hours on how to take a screenshot on Windows and stumble upon this article. Now, you’re in luck, because we bring you a concise and crystal clear guide on how to take a screenshot on Windows. Apple has a history of offering awesome features since its very launch. And the same applies to this simple yet extremely useful feature of taking screenshots.
Unlike other computers, on an Apple device, you can directly take the screenshot of the entire screen or just a small part of the screen, without having to install any third-party plugins. Also, you can capture a single window among the multiple applications’ windows open on the desktop. Well, let us explore all of these three options in great detail.
Related – How to Free and Clean up Hard Disk Space [Best Ways].
How to Take a Screenshot on Windows Using Print screen?
To take a simple and a very basic screenshot, that is the screenshot of the entire screen, you can follow the steps given below:
- To take a screenshot using the Print screen feature, press the Print Screen button (usually located on the right side of the F12 key). The screenshot has now been copied to the clipboard.
- Now, if you wish to save this screenshot as a permanent file, press and hold the Windows key along with the print screen button.
- The screen will turn a bit dim for a few moments, indicating that a screenshot has been clicked.
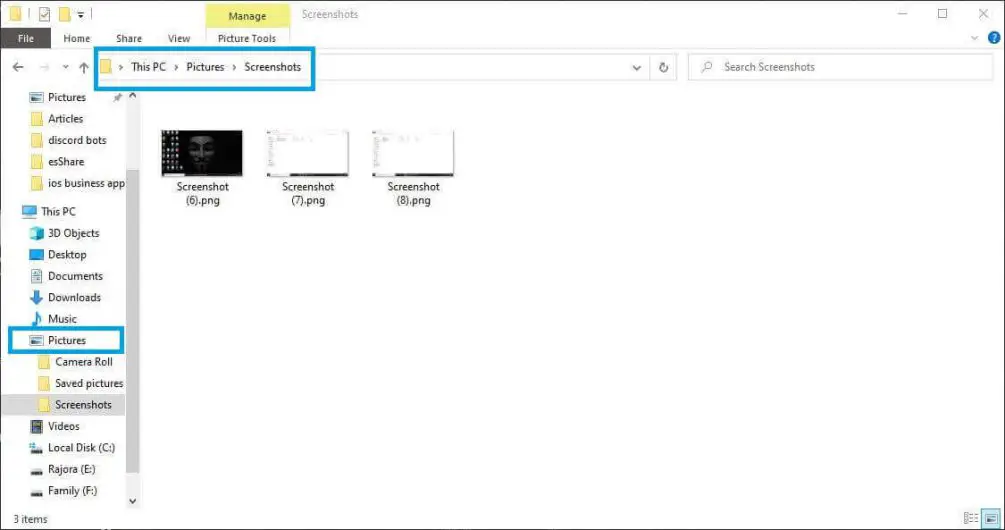
- This file will be saved in the Screenshots folder by default (located in the Pictures folder).
How to Take a Screenshot on Windows of a Particular Part of the Screen?
This is a more advanced option for taking a screenshot on Windows as compared to the last one. This can be said on behalf of the fact that the option we are going to look at allows you to capture a specific part of the screen, allowing you to exclude whatever you would not like to add in your screenshot. How cool is that!
Well, to do the same, you need to know the appropriate steps, which are given below:
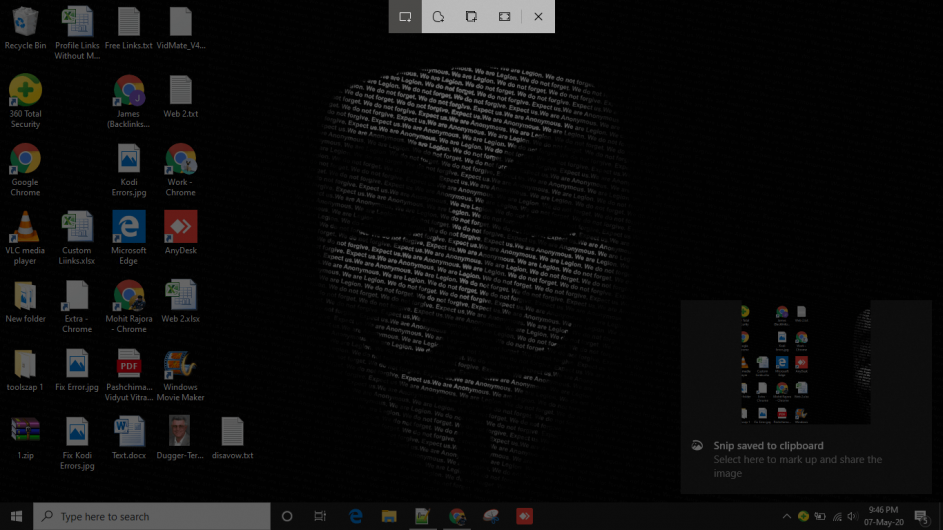
- Press and hold the Windows, Shift, and S keys at the same time.
- The screen will now turn grey, indicating that the screenshot wizard is now active.
- If you notice carefully, you will observe that the mouse pointer has changed into a cross-hair kind of a thing.
- Click on one of the corners of the part of the screen you want to capture, and drag the crosshair to the opposite corner, using your mouse or trackpad.
- The screenshot is now copied to your clipboard and can be pasted anywhere by going into Edit> Paste or, just by hitting Ctrl + V.
More – How to Fix Windows 10 Update Error Code ox8024a105 [FIXED].
How to Take a Screenshot On Windows Using the Windows Snipping Tool?
This is the most advanced option for our quest of how to take a screenshot on Windows, among all the three (as they say, last but not the least!). The option has been designed by the developers in such a way, that you can take the screenshot of a particular Window, excluding all other contents being displayed on the monitor. This can be of great help when you are trying to drag the attention of the viewer to whatever you are typing. Or you can be writing an article like this and would like to add photos just as we did right here!
Anyway, whatever the case may be, you firstly need to memorize the steps. Here you go:
- Firstly, you need to open the window or menu that you want to capture (pretty obvious!).
- Next, open the Start menu.
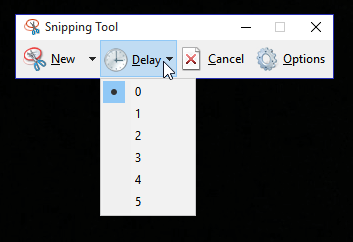
- Now in the search text box, search for ‘Snipping Tool’.
- When the snipping tool menu opens up, click on the new option on the top right-hand corner.
- Now, click and drag the box over the area you desire to take a screenshot of.
- If you want to edit the screenshot right now, you can do so in the menu that appears immediately after the process of cropping the screen
- Also, you may wait for the screenshot to save to your desktop, and then you can add your creativity to it.
How to Take a Screenshot Using the Nvidia GeForce Experience?
Before we dive in, let us tell you that this option will work for only those who have a dedicated graphics processing unit or graphics card from the company Nvidia.
Okay, now that you know that, let us proceed. Nvidia is one of the top graphics card manufacturers whose products are used by people working in varied fields. Be it machine learning, hardcore gaming, or productivity related work like video or photo editing, Nvidia covers it all.
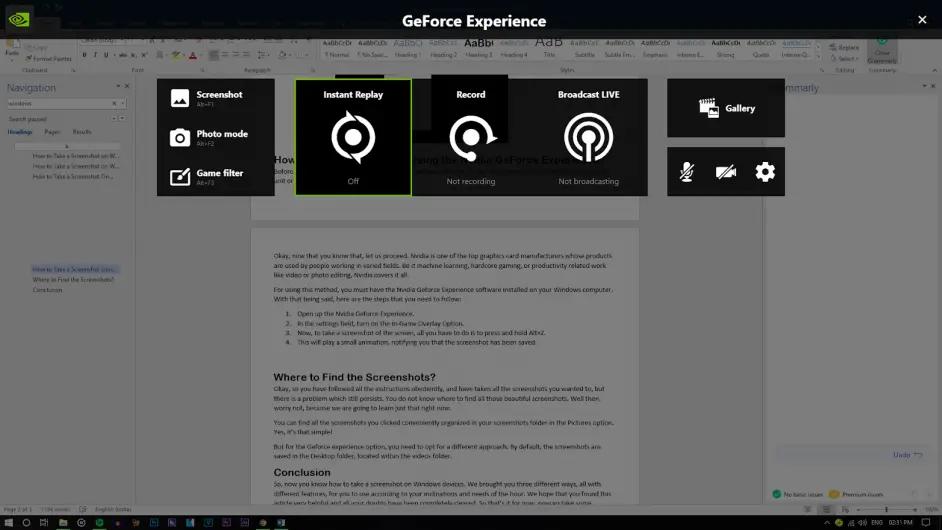
For using this method, you must have the Nvidia Geforce Experience software installed on your Windows computer. With that being said, here are the steps that you need to follow:
- Open up the Nvidia Geforce Experience.
- In the settings field, turn on the In-Game Overlay Option.
- Now, to take a screenshot of the screen, all you have to do is to press and hold Alt+F1.
- This will play a small animation, notifying you that the screenshot has been saved.
Where to Find the Screenshots?
Okay, so you have followed all the instructions obediently, and have taken all the screenshots you wanted to, but there is a problem which still persists. You do not know where to find all those beautiful screenshots. Well then, worry not, because we are going to learn just that right now.
You can find all the screenshots you clicked conveniently organized in your screenshots folder in the Pictures option. Yes, it’s that simple!
But for the Geforce experience option, you need to opt for a different approach. By default, the screenshots are saved in the Desktop folder, located within the videos folder.
More – Fix Error Your Windows License Will Expire Soon [FIXED].
Conclusion
So, now you know how to take a screenshot on Windows devices. We brought you three different ways, all with different features, for you to use according to your inclinations and needs of the hour. We hope that you found this article very helpful and all your doubts have been completely cleared. So that’s it for now, now go take some screenshots!
For more information, check out this link: https://www.microsoft.com/en-in


