

It has been considered of utmost importance on how to install IO shield. In almost all cases, every motherboard comes with a metal plate called the IO shield. As the name suggests, it shields the input/output ports of the motherboard. You might notice there’s a giant hole at the back of your PC case right where the motherboard ports will be accessible. Well, that’s where the IO shield is installed, and it’s the first step before screwing the motherboard into the casing.
That’s because once the motherboard is in place, and you have how to install IO Shield, then you will have to take it out again to install it. Which can be quite hectic, so, it’s always recommended how to install IO shield right after you unbox everything. Now you may be wondering if the IO shield is so necessary that it must be installed before anything, then what is it used for?
Also Read: Top 4 Best Budget AM3+ Motherboards [Pros and Cons]
Install IO Shield Uses
Originally, IO shields were used to protect analogue computers from electromagnetic interference coming from external components. Well today, everything has gone digital, and even though your computer will probably not get any EMI, it is still best to use an IO shield. Other than that, since an install IO shield is installed on the PC casing, which is grounded by the PSU, it can also protect your motherboard against static discharge from your fingers.
Additionally, knowing how to install IO shield also protects your computer from tons of dust. Just imagine for a second, without an IO shield, the back of your casing will have a huge hole from which you can see inside your casing, and a lot of dust will get inside from that hole. Not just dust, a huge hole right at the back of your casing will also invite all sorts of insects and bugs, which can get messy. So, it’s best to know how to install an IO shield to protect your PC.
An IO shield is just a metal plate that you insert to fill the empty space behind your computer casing. It is the first component to install on the casing before assembling even the motherboard and other hardware. The motherboard’s extension port goes into the shield and installing anything before it can force you to restart the building process from the beginning. Knowing how to install IO shield is important as it attaches itself to the casing and does not come off if properly installed. However, installing it for some PC cases can be quite tricky, probably because it needs quite a bit of force to fit perfectly.
How To Install IO Shield?
The IO shield usually comes in the motherboard package as an accessory. If you have a PC case with good build quality, then it should not be much of a hassle to install the shield. However, for low-quality casings and some custom IO shields, it may take a while for the installation. Nevertheless, the process is the same for all. Let’s move towards it straight away.
Remove the Factory IO Shield or the Old One
If your computer casing has a factory install IO shield, then it may not match your motherboard’s port. Similarly, you may be shifting to a new motherboard whose extension ports do not ally with the older one. In such cases, you will have to remove the IO shield already present in the casing. For that, simply push the IO shield with your fingers from the outer side of the casing. Sometimes, you may have to apply a little bit more force to bring it out.
Find the Correct Orientation of IO Shield
The process of how to install IO shield can fit on the casing even if you place it upside down. But the holes in the shield will not match the ports on the motherboard. It could be quite a hassle if you wasted your effort in fitting it inaccurately. So, you will have to find the correct orientation to place the IO shield.
Bring out the motherboard and place it on the desk. We recommend you use an anti-static mat or anti-static wristband while handling the board.
- Place the casing to the side of the motherboard.
- See in what orientation the motherboard stays in the casing and arrange it accordingly on the desk.
- Now, take the IO shield and line its hole to the ports on the motherboard to find the proper orientation.
Remember the orientation you just identified to install the IO shield in the same way later.
Bend the Prongs
You can find some prongs and extrusions coming out of the install IO shield. These should be kept in touch with the motherboard or the ports. This provides the grounding circuit for the motherboard to protect from sudden electric surges and static charges.
- Line up the IO shield with the motherboard’s port.
- Push it a little so that the ports come through the holes.
- Bend the smaller prongs such that they touch the ports.
- Bend the bigger prongs so that they are in contact with the upper side of the ports.
You can now take the IO shield out of the motherboard.
Remove Any Rear Casing Fans
Some computer casings provide rear system fans right above or below the IO shield. This makes it difficult to insert the shield in its place properly. So, you should unscrew the rear casing fans, if any, and remove them from the inside of the casing.
Perform the Installation
Now, we are ready to fit the IO shield to the casing. Bring the install IO shield in the orientation identified earlier, and let’s move on to perform the installation.
- Place the casing in a sturdy position so that it does not move or slide while applying force.
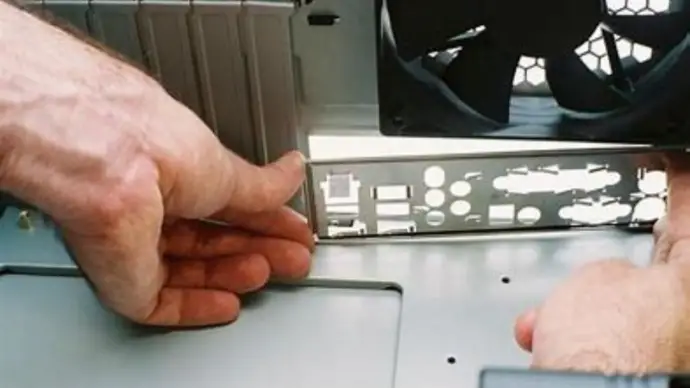
- Place the IO shield to the space in the casing from the inside.
- Push the shield from its corners. You may have to apply force slightly.
- Do this for all four corners. You should hear click sounds. Ensure that the little bumps on the IO shield come out of the metal brace of the casing.
- Push the edges further to make sure it is completely attached and does not fall off.
Some cheaper and low-build quality install IO shields may be difficult to insert. In such cases, you can follow the instructions given below.
- Place the casing such that the space for the IO shield lies on the table.
- Put the IO shield in its place and apply force to its corners for proper attachment.
- Now, insert the motherboard into the casing and align its port with the IO shield.
- Push the motherboard gently until its ports go through the shield. Ensure that the motherboard screw holes align with the standoff pins on the casing.
- Tighten the motherboard to its position by using the screws.
You should find the install IO shield fits perfectly.
You can now move on to other hardware components, starting from the rear casing fan you removed earlier.
Is It Necessary to Install IO Shield?
There are a few advantages of using the IO shield in the computer casing. Let’s look at them.
- It protects the inner components and their functioning from interference by external electromagnetic devices.
- It provides a grounding circuit through prongs for the extension ports of the motherboard, saving them from static charge.
- It prevents dust and dirt from entering the casing easily.
- It fills the void in the back of the motherboard and provides aesthetics to the PC.
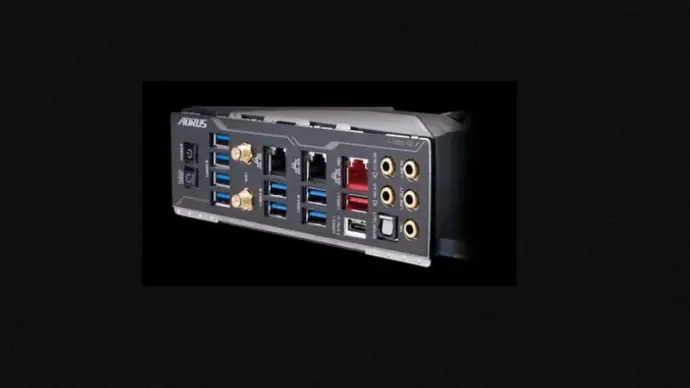
However, nowadays, the motherboard comes with an in-built IO shield. So, you do not have to worry about installing it yourself.


