

Minecraft is a game that is spreading like a wild forest fire. This game literally rules over all the major streaming platforms, be it Youtube, Mixxr, or even the most popular of them all, Twitch. If you check the stats on Twitch, you will most probably rethink about your video game preferences! Even huge AAA titles like PUBG, Apex Legends, or Fortnite can’t compete with Minecraft’s retro-style pixelated graphics. Lets talk about how to allocate more RAM to Minecraft Server.
Now, after reading all that, you must have decided to download it, install it, and maybe even stream it to get some bucks in your wallet. But wait! Minecraft, even though it looks like an old arcade game that can run on any PC, actually requires some beefy specs. Why do you think people run it on RTX 2080 ti!? Anyway, it will most probably be that you will face lags, stutter, and low frame rates, all because of your low RAM allocation. To fix that, we are here to tell you how to allocate more RAM to Minecraft Server.
Read More: How to Find Printer IP Address [Proper Guide].
Basic Idea of What We’ll Be Doing
Minecraft runs pretty well on systems that house a lot of RAM, but there is always scope for improvement, isn’t it? And in this article, we’ll be doing exactly that. Also, Minecraft can be run by you on a server. So, let’s allocate more RAM to it in both cases.

Earlier, allocating more RAM was a huge pain, as it involved changing a lot of code, and the chances of human error proposed a possibility in which the game’s important files would be damaged and rendered useless. But it’s 2020, and all that has now changed with the launch of ATLauncher, which is free third-party software.
How to Allocate More RAM to Minecraft
Now that we have ATLauncher at hand, all the fancy coding and fiddling work have been taken care of by the developers of the software. All you are supposed to do are to follow the given steps:
- Open the game launcher.
- Check if the game is in its latest version or not.
- If not, start the update process and keep reading.
- Check how much RAM your system has inside it. For doing so, click on the Start Menu and click on the gear icon to open up the settings window.
- Once inside the settings panel, go into the system sub-menu and click on about.
- Next, open up your browser and download the ATLauncher software.
- Install the software and open it then after.
- On the right-hand side of the launcher window, select the Settings option.
- Now, click to open the Java/Minecraft tab.
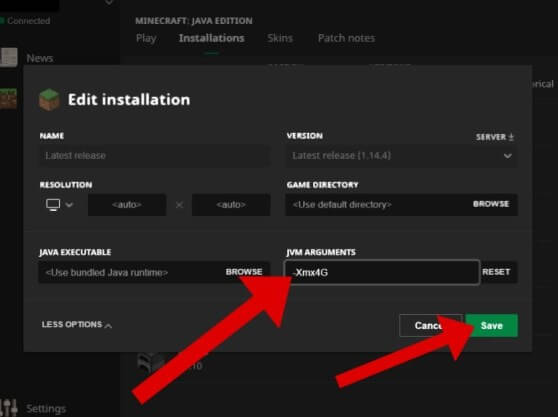
- Input the amount of RAM that you would like to allocate (in MB, not GB) in the Maximum MemoryRam field, or use the arrows to adjust the value by a small amount at a time (recommended – 0.5GB at a time).
- Click on the Save button to preserve the changes.
And that is all about it! Now open up your game, and this time it will use the memory you have allocated just now.
How to Allocate More Ram to Minecraft Server
Now comes a little bit tricky part. This is because allocating more RAM to a Minecraft is not a direct option offered by the ATLauncher software that we have been using till now. Anyway, to make it easy and fun is our job, and we have done just that. Feel free to follow along:
- Open up your file explorer by double-clicking on the This PC icon.
- In the top right-hand corner, in the search bar, search for ‘Minecraft_server.’
- Double click on the first folder that pops up.
- Right-click and in the new submenu, select the text document option to create a new text file.
- Open the newly created text file and type in the following:
‘java -Xmx####M -Xms####M -exe Minecraft_Server.exe -o true
PAUSE’
- Replace the #### expression with the amount of RAM in MBs that you want to allocate to the Minecraft server. For your knowledge and convenience, 1GB = 1024 MB.
- Next, click on the File menu and select the Save As option. In the window that pops up, type in the file name as server launcher, and change the file extension from .txt to .bat. Click on Yes if asked for a confirmation.
- To run the Minecraft application, simply double-click on the file you just created. Minecraft server will now utilize the same RAM that you specified.
Also Read: How to Check Mouse DPI Online Windows.
Conclusion
So that’s how you allocate more RAM to Minecraft one of the most popular games of all time, that is, Minecraft. We tried to keep the tutorial as simple as possible for you to get playing without much fiddling around. One thing to keep in mind is that the process requires the careful following of all the steps, or you can damage some important files, and then you’ll have to install it all over again. So, it is better to get it right the first time.
For more detailed instructions, you can refer to OBS’s official site: https://obsproject.com/wiki/OBS-Studio-Quickstart.
So what are you waiting for? Go and do some Minecraft-ing!


