
Let’s say that you downloaded your favorite video game from your favorite game website, and it was a hefty one, let’s assume 60GB. Now, the downloading is finished, and all that remains is to just install the game and have unlimited fun. But just as you initiated the process, the installer gave you an error saying that your lovely hard disk doesn’t have enough space to store such a massive amount of digital data. Looking for how to Free up Disk Space?
More – How to Fix Windows 10 Update Error Code ox8024a105 [FIXED].
[Best Ways] How to Free up Disk Space
That’s extremely annoying, to say the least! In that case, you’re liable to search the web for how to free up disk space. And that’s what we’re here for, bringing you not four or five, but 8 different ways for how to free up disk space in large amounts on your computer. Let’s dive in.
1. Windows Disk Cleanup
This feature comes inbuilt with the Windows operating system and can be accessed through the Start Menu or the Control Panel. This is the most obvious answer to how to free up disk space as this program requires no installation or third party software to perform its job. In addition to this, you won’t have to worry about your important data being lost or erased.
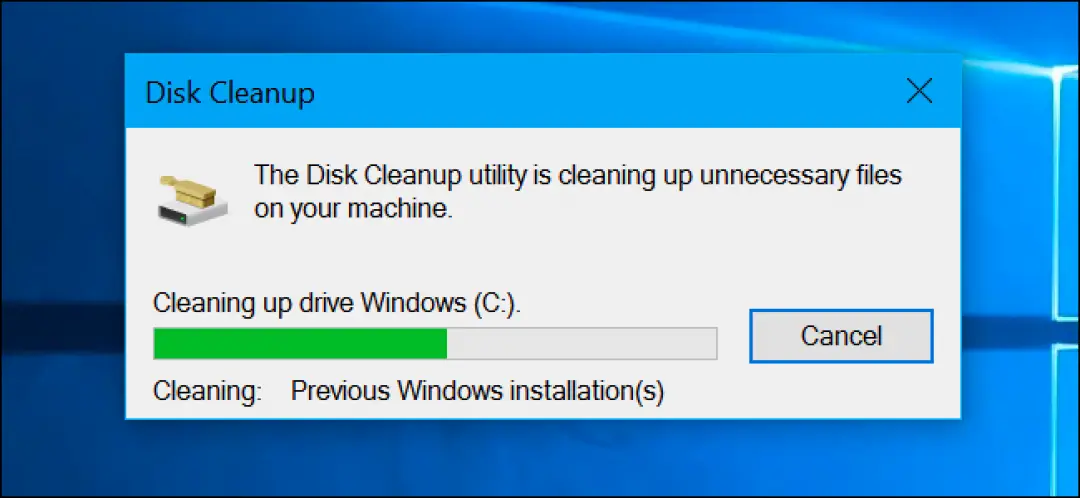
Windows Disk Cleanup looks after all that. Also, unnecessary Windows update files, that cannot be deleted the usual way can be removed using this option, regardless of their size.
Steps:
- Double click on This PC.
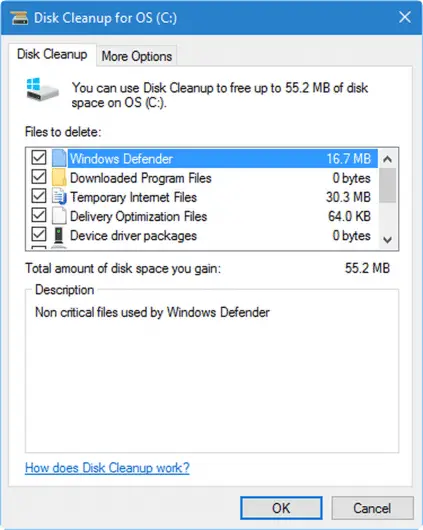
- Right-click on the drive you want to clean up and click on properties.
- In the pop-up window, under the general tab, click Disk Cleanup.
- After running a scan, the application will let you know how much space can be freed on the selected drive.
- Select the files you want to delete and hit the OK button.
- A few minutes later, the selected files will be removed, and you’ll have the free space you desired.
2. Remove Temporary Files
Even if you applied the above method, there still might be Gigabytes worth of Cookies, browsing history, and temporary files. “What’re these temporary files?”, actually they are the files created by windows itself so that the actions you usually perform are done quickly executed every time.
A real-life analogy could be a situation in which an application that a person uses a lot, such as a word processor or some programming environment, and Windows studies the user’s routine of working and creates some temporary files for the respective software. Now, every time the user launches the application, it opens up much quicker as compared to other applications.
Steps:
- Close all open applications.
- Double click on This PC.
- Right-click the system drive, then select Properties.
- On the General tab, select Disk Cleanup.
- Scroll down in the Files in Delete list, then select Temporary Files.
- Click OK, and then click Yes to confirm the deletion.
If the above steps don’t solve the problem, It may also be the case that your laptop is not sufficient of running a particular programming software. If that is the case, its recommended that you invest in a budget laptop that can easily run any of your programming apps.
Related – How to Fix Confirm Form Resubmission err_cache_miss [FIXED].
3. The Obvious Trash
The most obvious trash that could be residing on your hard drive is the one sitting inside the Recycle Bin. When you delete a file or folder whose’s size is a few gigabytes, Windows sends the file or folder to the Recycle Bin instead of erasing it from the computer’s memory straight away.
This is done as a security for the user if he/she decides to restore it later. However, not all files are worth recovery. Consequently, it becomes a necessity to remove them in our quest of “how to free up disk space.”
Steps:
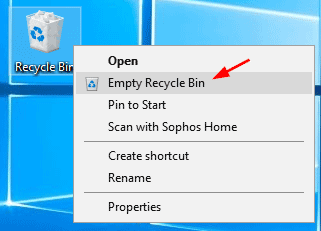
- Double click on the Recycle Bin icon on the desktop.
- If, for some reason, the icon is not there, launch it from the Start Menu.
- On the upper right-hand corner, in the toolbar, click on the Empty Recycle Bin option.
- All the data stored within the Recycle Bin will be obliterated.
4. Store Data on the Cloud
It’s the 21st century, and cloud computing has taken over the globe. There are innumerable companies providing loads of free cloud storage and paid extension to the storing capacity if you happen to need some.
Even Microsoft has its own dedicated cloud storage platform known as OneDrive, which has a direct link with the file explorer. So, there’s literally no reason for you to stifle up your hard disk. General instructions to store data on a cloud server are given below.
Steps:
- Create an account on the website of the cloud storage provider.
- Navigate to the home-page of the cloud storage facility website.
- Create a folder if you require one.
- Click on the add files option, and select the files you want to store on the cloud server.
- Click OK or Upload to upload the data on the server.
- Alternatively, you can just drag and drop files from your file explorer on the browser window.
5. Remove Duplicate Files
It is possible that you may have accumulated loads of duplicate files over time, which are not only unnecessary but occupy space on your drive for no reason at all. But since Windows doesn’t provide any dedicated program to find and delete the duplicate files, third-party software is needed to do the same. There are several applications for doing the task.
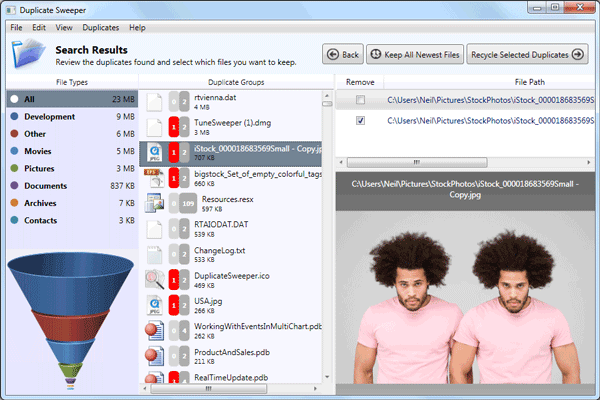
This option will surely help you to get an answer to how to free up disk space on Windows. One such application is Duplicate Sweeper. It is a free program and can be downloaded easily through your web browser. Since every software will have a unique UI and features, we recommend checking out the steps for your software on the dedicated website.
Link to download: https://www.microsoft.com/en-us/p/duplicate-sweeper/9nblggh3vt1p?activetab=pivot:overviewtab
6. Defragmentation of Hard Drive
To understand this method, we must have an idea of what defragmentation of a hard drive is in the first place. Whenever you store any file or some data on your drive, a part of the drive’s memory is allocated to store the particular file. If this process continues for a long time, the hard drive becomes fragmented or gets divided into various fragments or pieces.
This implies that there are gaps in your drive where data can’t be written. Consequently, the data storage limit decreases, and the computer has a hard time reading or writing information. The most efficient solution to this problem is to use Windows’ inbuilt Disk Defragmenter program. It is one of the best answers to how to free up disk space
Steps:
- From the Start Menu, launch the Disk Defragmenter program.
- From the list of all Disks connected to your computer, select the one you want to defragment.
- It is recommended that you choose the one which has the highest percentage of fragmentation.
- After selecting, hit the Defragment Disk option on the bottom right-hand corner.
- Wait for the process to finish up (which might take several minutes depending on the size of the disk and fragmentation)
- Repeat the process for the other drives (if necessary).
7. Uninstall Space Hungry Applications
Some applications indeed can have a humungous size. They may be some spec-hungry software or a game that you once loved but don’t enjoy playing any longer. In our quest of how to free up disk space, uninstalling this unnecessary software and applications can bring you tons of free disk space, without much toil.
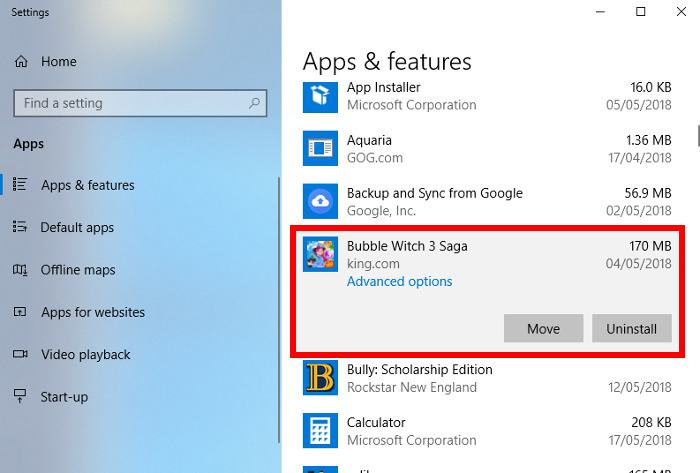
In addition to this, it’s pretty basic and self-explanatory and one of the simplest answer to how to free up disk space. You need space; well, free up some!
Steps:
- Click on the Start Menu and open the Control Panel.
- Click on the Uninstall a Program option.
- From the list, identify the program occupying loads of Gigabytes on your drive.
- Click on it and hit the uninstall button.
- If asked for a confirmation, click on yes.
8. Reduce Space Allocated for System Restore
The last resort to free up space is reducing the memory allotted for System Restore feature in Windows. Windows creates restore points for you to restore your system from and previous copies of the stored files. You must have observed this when you were working on some important documents, and the power went out immediately.
To be worried about in such a situation is normal, but when you see that you have the option to restore your unsaved work, you breathe a sigh of relief. We trade some functionality of this feature in return for free disk space.
Steps:
- Right-click on This PC and click on Properties.
- On the left corner, select System Protection.
- Inside the System Protection pop-up window, click on configure.
- Using the slider, set a new memory allocation limit for System Restore.
- Click on Apply.
- Click OK to exit out of the window.
More – Fix Windows 10 Microsoft Compatibility Telemetry High Disk Usage [FIXED].
Conclusion
Summing up, we’d suggest starting from the Disk Cleanup option to clear the maximum possible space without compromising on stored data. Next, you may proceed to remove the obvious trash from the Recycle Bin, followed by the removal of duplicate files. Apart from this, storing data on the cloud is always a smart option.
Why waste so much of FREE cloud storage! Advanced options like removing temporary files and disk defragmentation would require you to know exactly what you are doing or else, your beloved data can be in danger. As said earlier, use the “reduce space allocated for system restore” only as a last resort, as this might affect Windows’ functioning. So those were the best ways we could suggest for your question of how to free up disk space on Windows. Hopefully, now you would not have to search Google for “how to free up disk space”!


